How to Improve Your Website Speed and Performance with WP Rocket
In a piece titled Top Website Statistics For 2024, Forbes revealed that 47% of users won’t wait longer than two seconds for a website to load. Think about it: you have, at most, two seconds to get your audience’s attention, or they will click off your site. In fact, in the same article, it was revealed that users form an opinion about a website in just 0.05 seconds.
The writing on the wall is clear: website speed is very important.
And it affects everything. From web traffic to retention to conversion; everything depends on speed. It’s also a factor that may be affecting your site’s SEO ranking. There’s no point in receiving a million visitors to your site (though I wouldn’t complain if that happened) if they click off in less than 2 seconds. That’s a nightmare for bounce rates and engagement stats. It’s also why so many businesses I’ve worked at are obsessed with CRO.
But, before we delve into the crazy world of conversion rate optimization, we should probably focus on improving your website speed. Consider this the second part of our mini in the middle of a Google Update series.
NOTE: This page contains affiliate links. This means that if you make a purchase through my links, I will receive a commission, at no cost to you.
What is Site Speed and Why Does it Matter?
Website speed, or site speed as it’s also called, refers to the amount of time it takes for a web page to fully load and become interactive for users. It includes several factors, including server response time, file sizes, and the overall structure of a website.
As users grow increasingly impatient, the site speed has become a critical component for any successful website. Faster websites enhance user satisfaction, improve search engine rankings, and significantly impact conversion rates.
1. User Experience
As mentioned above, the user experience is directly tied to your website speed. A slow website leads increases the likelihood of visitors bouncing from the page. Additionally, slow load times can hinder engagement, leading to fewer page views and shorter sessions.
2. SEO
Google and other search engines use site speed as one of the ranking factors for SEO. Pages that load quickly provide better user experiences and are more frequently indexed by search engines, which can improve your overall visibility.
Interested in learning more about SEO? Read my blog: The Absolute Beginner’s Guide to SEO.
3. Conversions
Whether it’s a purchase, signup, or another call-to-action, slow load times often deter users from completing transactions. Studies show that a mere one-second delay can result in a 7% drop in conversions.
Understanding the Performance Metrics of your WordPress Site
To properly and effectively enhance your website’s speed and overall performance, you need to understand performance metrics. So, if you’re a new blogger, or a small blogger like me, it’s super important to see where your site’s pain points are.
Here are the key performance metrics you should be monitoring:
1. Page Load Time
Page load time refers to the time it takes for a web page to fully load and become interactive. It’s a critical metric because it directly affects user satisfaction and retention. Generally, faster load times are better, with an ideal target being under 2 seconds. Tools like Google PageSpeed Insights, GTmetrix, and Pingdom can help you measure this metric.
2. First Contentful Paint (FCP)
First Contentful Paint represents the time it takes for the first piece of content (such as text or an image) to appear on the screen. It gives users an initial indication that the page is loading, improving their perception of speed. Tools like Lighthouse and WebPageTest can help track FCP.
3. Largest Contentful Paint (LCP)
Largest Contentful Paint measures the time it takes for the largest content element (such as a cover image or large text block) to become visible. LCP is an important metric for user experience as it reflects the point at which the main content of the page is fully loaded. You need to aim for an LCP of 2.5 seconds or less for an optimal user experience.
4. Cumulative Layout Shift (CLS)
Cumulative Layout Shift assesses the visual stability of a page by measuring how much the content shifts during loading. A high CLS value indicates that the elements on a page move around as it loads, which can lead to a frustrating experience for users. Aiming for a CLS score of 0.1 or less ensures that your page remains visually stable and predictable.
5. Total Blocking Time (TBT)
Total Blocking Time measures the total time during which the main thread is blocked and unable to respond to user interactions. A high TBT can lead to sluggish performance and a poor user experience. Reducing TBT involves optimising JavaScript execution and reducing long tasks that block the main thread.
There are other metrics as well, but for now, keep an eye out for these key metrics when looking at your website’s performance.
Now, I know. These terms can seem so convoluted to someone who doesn’t have a lot of experience with them. I’ll confess that I actually learned a lot about these metrics during a site migration at work last year.
There’s a lot that can be done from a development angle to help your site, but what do you do if you have a site already and you’re looking for those quick wins?
Where Do You Start?
So, first thing’s first: the key to optimising your site lies in those “low-hanging” fruits that you can fix quickly. As someone with no formal training of web development, I’m not the most well-versed when it comes to this particular topic. In fact, whatever I know comes purely from falling down the product management rabbit hole at work.
Naturally, when I started this blog, I had to learn a lot of things I had no idea about. Somethings I know a lot about, for others, I still have to reach out to my developer friends for help. One thing I’ve gotten really good at over the past few years is finding low-hanging fruits to speed up my site. I do this using a simple WordPress plugin.
But before you move onto that, you should probably check how bad things are for your website. In my case, I’ve been invested in site optimisation since day one, given the sheer importance of it, but if you’ve been ignoring that, there’s actually a really efficient way to do so.
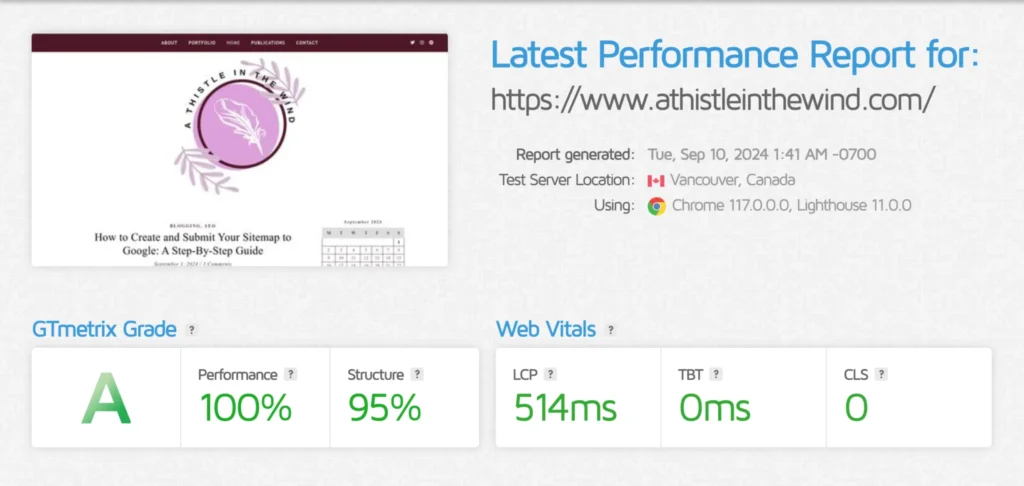
I use GTMetrix to check my website speed. Sure, there are other tools out there but I find GTMetrix to be really accurate. Of course, you have the option to buy the credits, I find that the free version works just fine too.
Anyway, you can see how my site’s doing here:
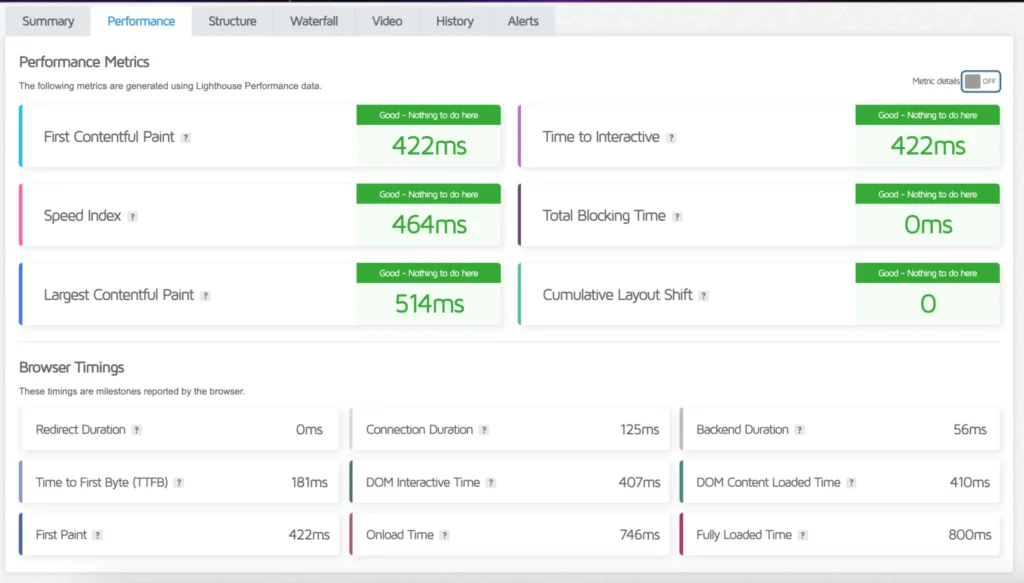
As you can see, I’ve done quite a lot to ensure that all the key performance metrics I’ve talked about have good results. But if you haven’t done this, and your overall site score is less than B (or worse, C), you can start optimisation today with WP Rocket.
Introducing WP Rocket: Your All-in-One Solution For Quick Site Speed Fixes!
I use WP Rocket to monitor my website speed. It’s a caching plugin designed to help you enhance the speed and performance of your site. It tackles various aspects of site optimisation, and has features such as:
1. Caching
With a simple click, you can cache your WordPress site, making it load fast.
Note: I like to cache my site once I’m done publishing a new post, but if you don’t do that, there’s actually a feature for this on WP Rocket too!
2. Cache Preloading
WP Rocket automatically pre-loads cache every time you make any changes on your website.
3. Browser Caching
With this feature, important resources of your website, such as images, JS and CSS are stored in the local memory of your users’ navigation device, both on mobile and desktop.
4. GZIP Compression
As the file size of your web pages compresses on the server, and decompresses in the browser, users can get to your site more quickly.
5. eCommerce Optimization
If you have a shop section on your site, using caching tools can be a bit of a trouble, but with WP Rocket, you can easily exclude checkout pages from the cache, leading to seamless purchase processes.
6. All Around Compatibility
What initially drew me to WP Rocket was its compatibility with themes and plugins. If you’re using a theme for your WordPress site, there’s a HUGE chance that it’s compatible with WP Rocket. This is super important because I have very specific plugins and I can’t turn them off due to some incompatibility issue.
Installing WP Rocket on Your WordPress Website
WP Rocket is a premium tool, so while there is a free version of this (and if you’re just starting out, that might be a better choice for you), there’s also a much better paid version on the market. For a single website, the full year’s subscription is $59, and I’d say that it’s worth it.
If you’re interested in buying WP Rocket, you can use my link (at no cost to you), to do so.
It’s super easy to use, it’s extremely intuitive and I can view all the critical site optimization features I’ve talked about in one space – plus installation is super easy!
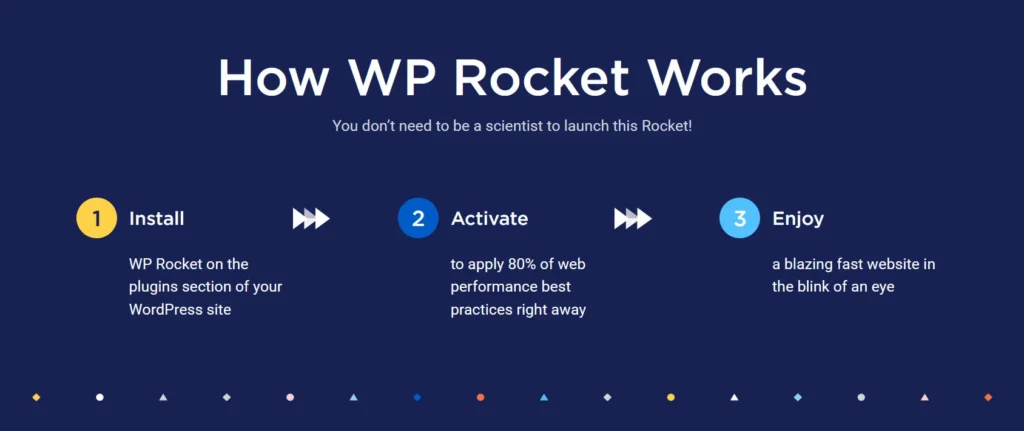
To install WP Rocket, follow these FOUR simple steps:
Step #1: Download the Plugin
Go to the website and buy whatever subscription plan suits you. After your payment has been processed, you’ll be able to download the ZIP file that contains the plugin.
Step #2: Go to Your WordPress Dashboard
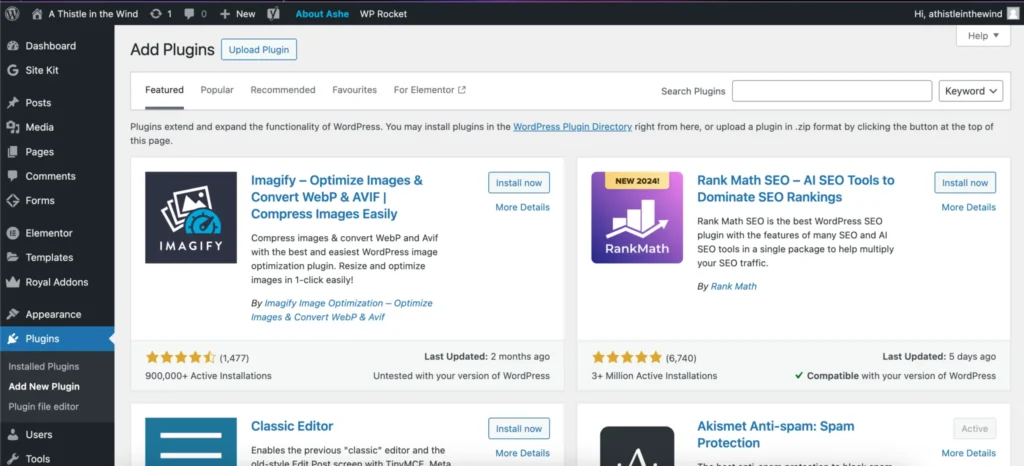
Simply log into your WordPress site, and click on “Dashboard.” Next, you’ll go to “Plugins” in the side bar and click “Add New Plugin.” You’ll see “Upload Plugin” located on the top-left of the page:
Step #3: Upload and Install WP Rocket
When you click on “Upload Plugin,” you’ll have to navigate to WP Rocket’s ZIP file on your local computer. Double-click to upload it, and install!
Step #4: Activate the Plugin
Once your installation is complete, you’ll see an “Activate Plugin” button. Click on and WP Rocket will immediately start caching your website.
At this point, I would recommend that you run a report on GTMetrix, as you should immediately start seeing site improvements.
Setting Up WP Rocket
Now, you could stop there, but if you look at WP Rocket’s plugin settings, you’ll see there are quite a bit more options that can further reduce your site’s loading time. I’ll show you what I’ve done.
Dashboard
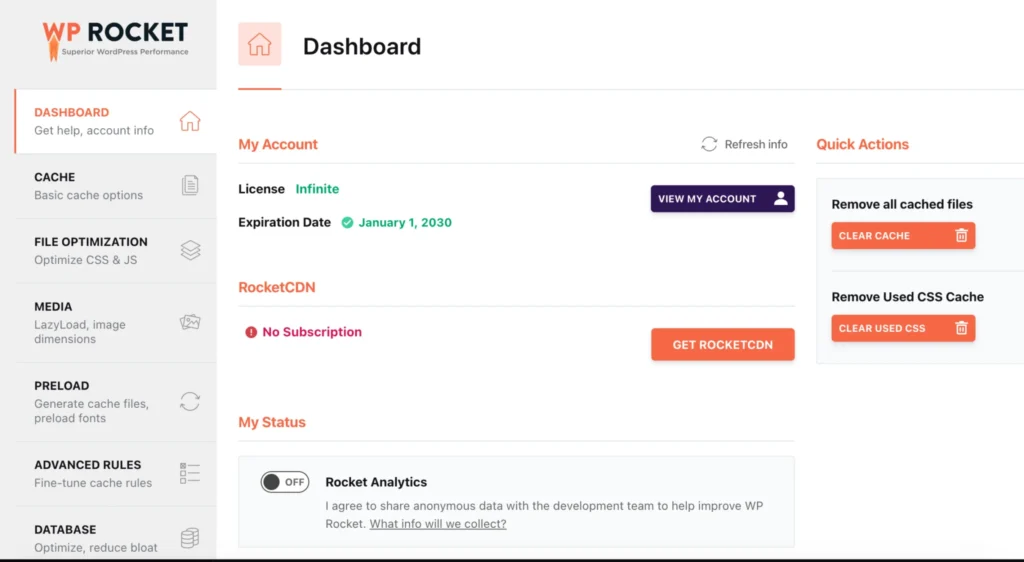
As you can see, I’ve turned “Rocket Analysis” off. I don’t want it, and chances are, you won’t either. Keep an eye on “Clear Cache” though; this is what you’ll use to clear your cache at the end of the set up. Next, we’ll move on to “Cache.”
Cache
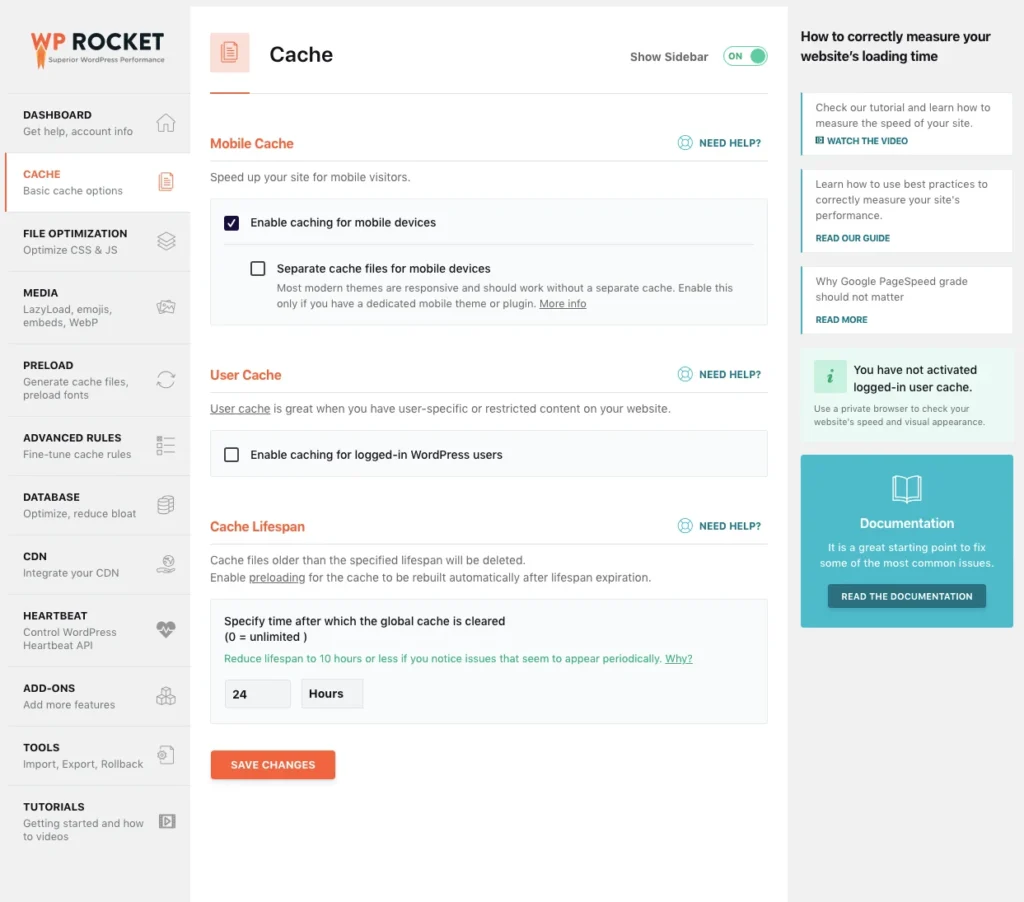
Make sure that you have “Enable Cache” and “Separate Cache Files for Mobile Devices” checked in this section. Everything else should remain as is.
File Optimization
Check all the options for maximum optimization, but you have to be careful! Some templates that use CSS and JavaScript may break if you minify all of them. My suggestion would be to start checking one option at a time, see if your site looks good, and if you come across a checked option here that makes your site look off, uncheck it and move on.
Media
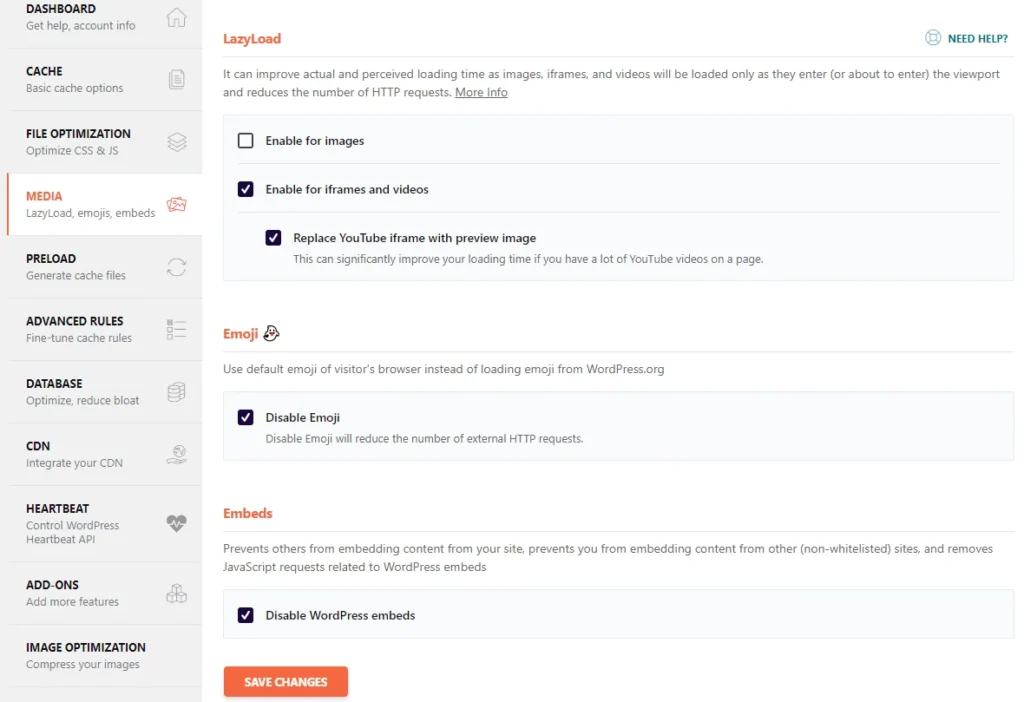
Again, in this section, you can check all the options and see what your site looks like. One thing I would recommend though is to think about lazyload. If your site uses a lot of images, I would recommend not having lazyload enabled as it causes a slight delay in images being loaded. Other than that, you’re good.
Preload
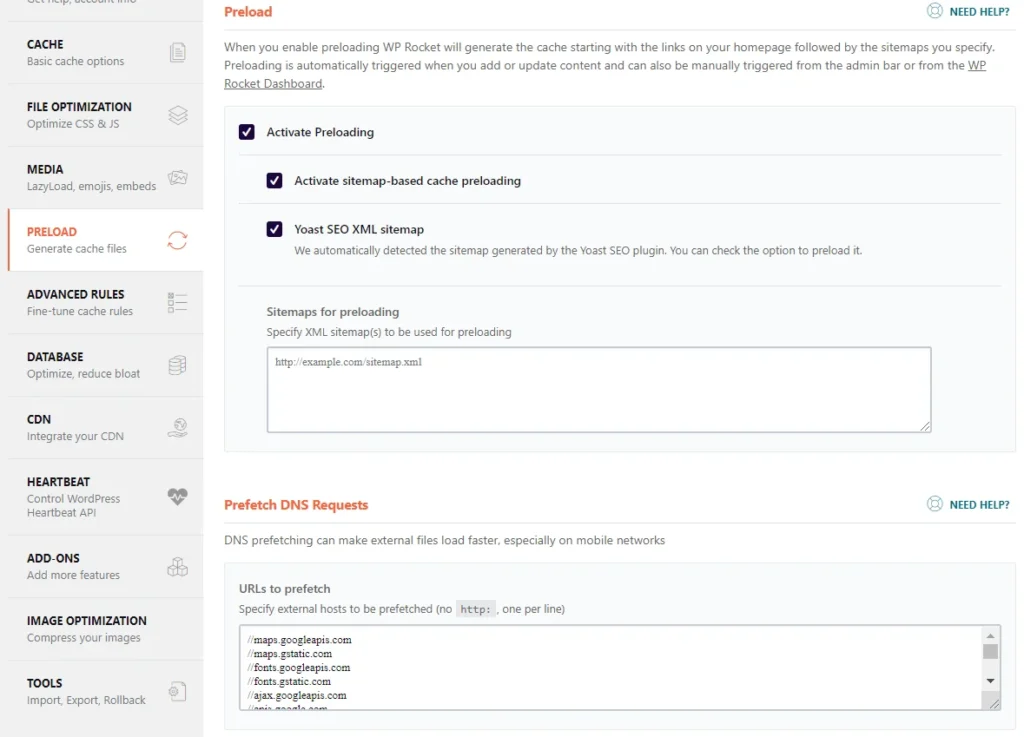
In this tab, you can define if you want some files to be preloaded. Your sitemap comes on top of this list. If you’re using Yoast for sitemap generation, you’ll want to check the box (as shown). However, if you’re using the XML Sitemap Generator for Google like me, you’ll have to enter the link in the specified box. Additionally, in the Prefetch box, you can enter links you think will be beneficial from being preloaded. These include Google Maps, Google Fonts, the Pinterest API and others. This depends completely on your needs so think about it before you add the sites. You can always come back to it later.
Advanced Rules
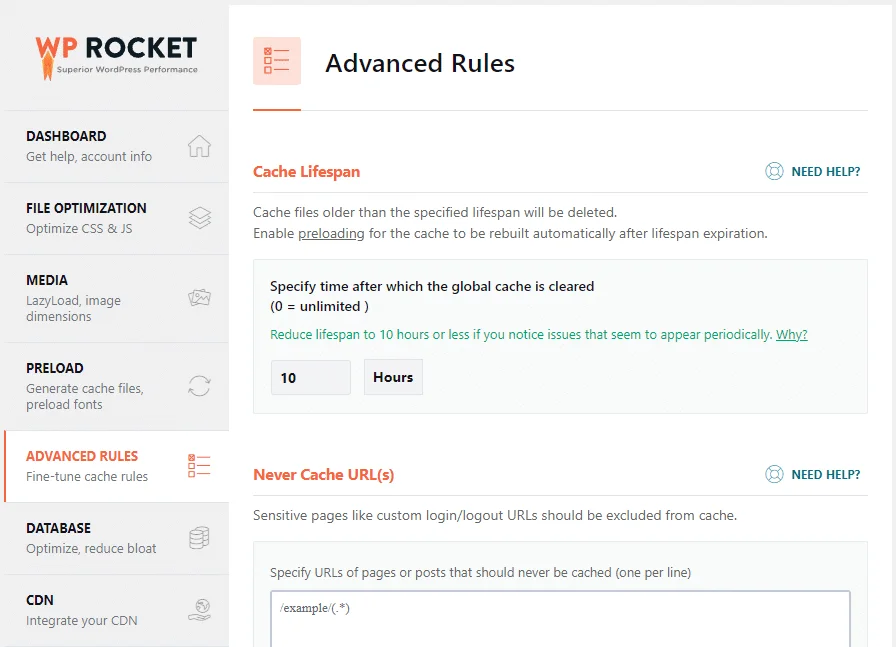
The “Advanced Rules” section gives you a chance to add any additional rules you may have. Since I didn’t have anything (as of now) to add, I left it blank.
Database
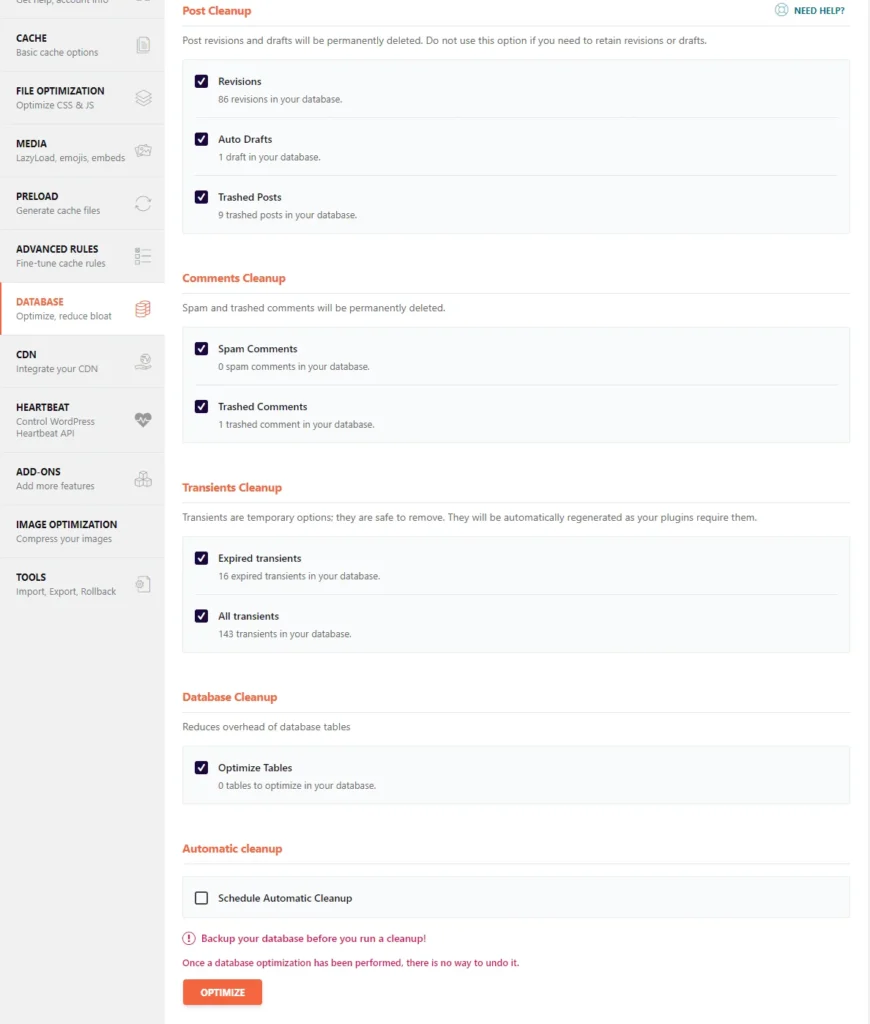
This is a really important section as it gives you a chance to optimise your site even further. I usually manually clean up my database once a month, but if you have more content on your website, you can do it once a week. You can set up an automatic clean up to sort out things like spam comments too.
CDN
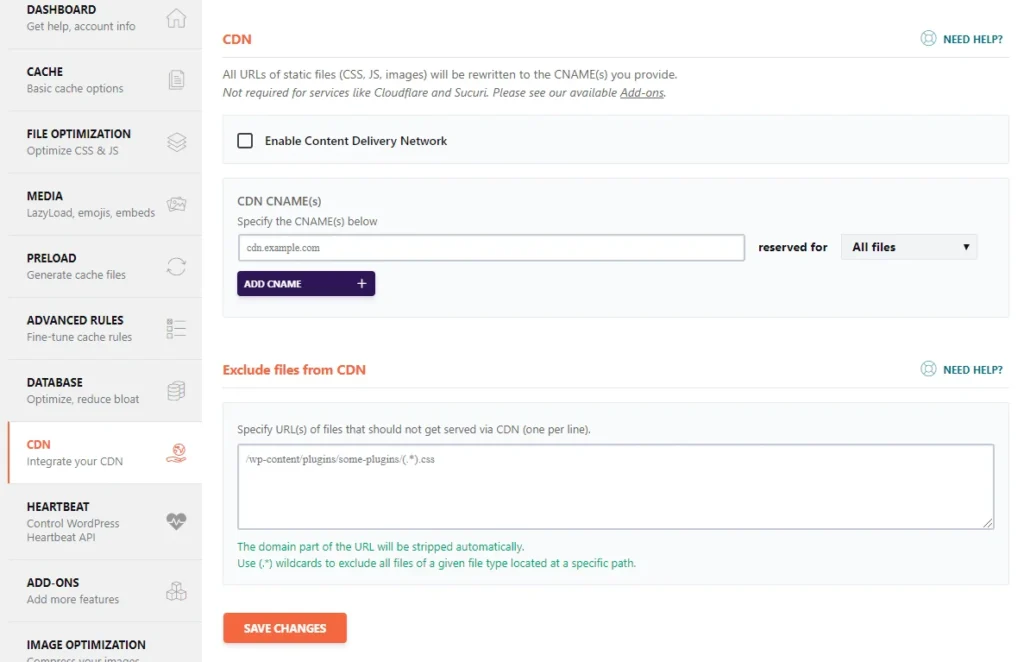
I don’t really have anything to set up here because I already have a free CDN, but if you don’t, you can create a free Cloudflare account. In that particular case, you will need to manually enable CDN in this tab. Otherwise, you can skip ahead.
Heartbeat
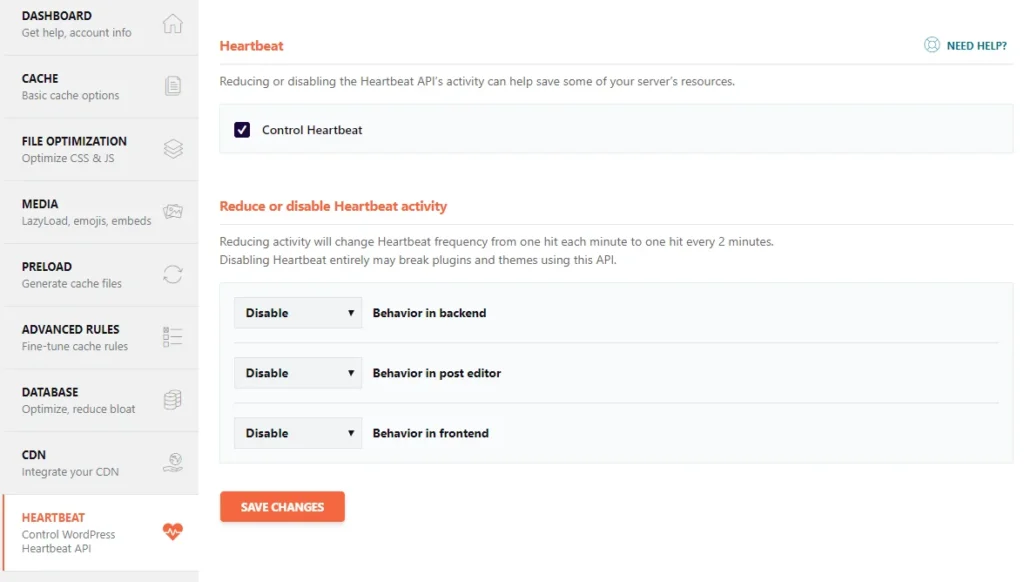
I don’t really use this section, so apart from enabling “Control Heartbeat,” you can leave everything else disabled too.
Add Ons
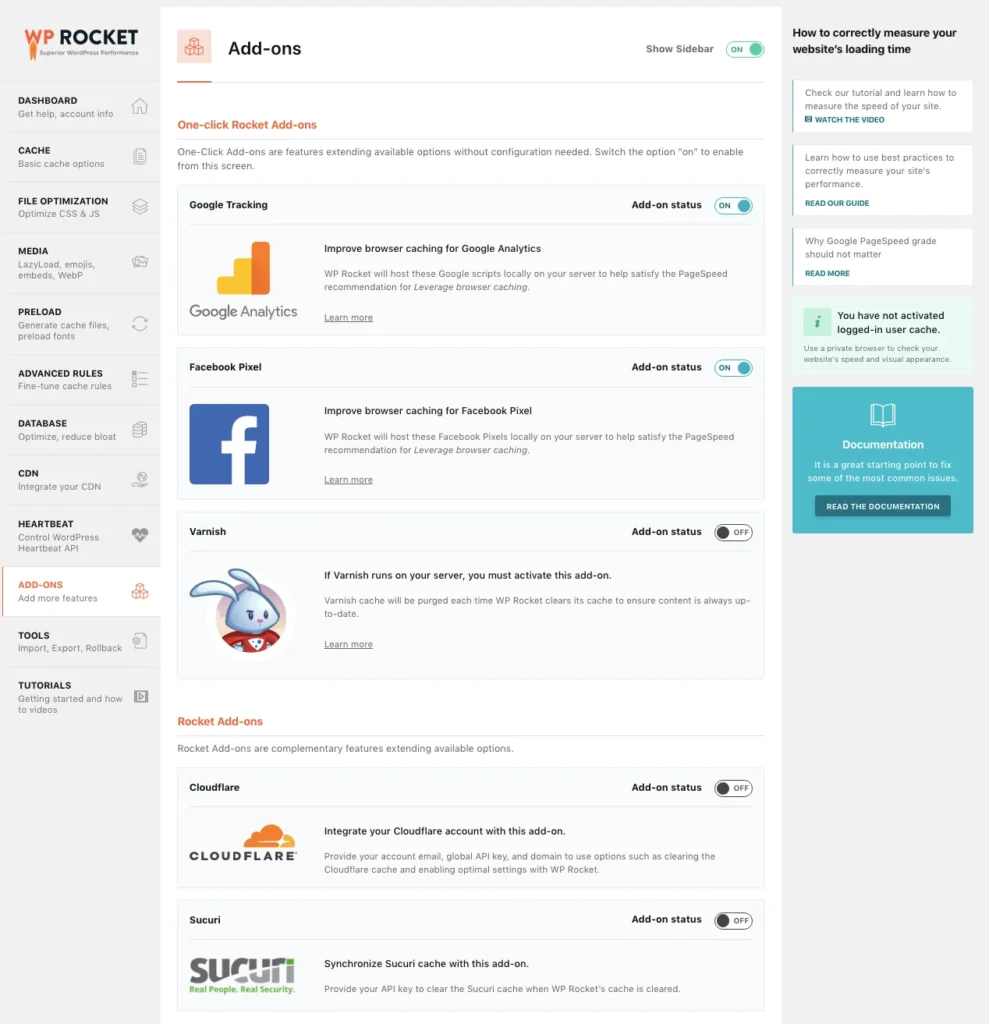
If you’re using Google Fonts like, you will have to turn these add-ons on and WP Rocket can host them locally rather than adding them each time when your site loads. This will naturally lead to higher website speeds. You’ll also see other options such as Cloudflare. You will need to turn this option on, and make sure you have properly defined your CDN name and enabled it (we did this in the CDN section above).
Image Optimization
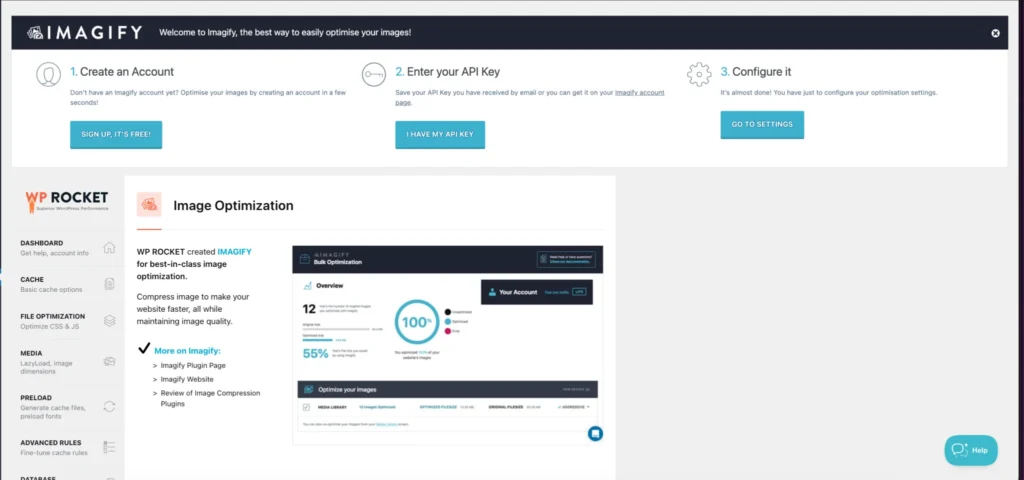
Image optimization is an important part of website speed optimization. If you don’t use any image optimization plugin, you’d benefit from installing Imagify. Simply go to “Add New Plugin” to install it on WordPress and you’re good!
And that’s it! Once you’re done with your WP Rocket set up, make sure to go back to the Dashboard and click “Clear Cache.” My goal for page load time has always been under 1.5 seconds and by following these simple steps, you can achieve that too!


You May Also Like

How to Create Content in Our Brave New AI-Powered World

Book Talk: What I Read in June